So, as you all may remember, the intake spout sheared off the case of my vespa...
Well, I fixed that. I added material to the case with a Lincoln ProMIG 135 that I adapted to run a Lincoln Magnum 100SG spool gun. The two are not compatible from Lincoln. I had to break the welder open to make some modifications and add a switch - it was pretty easy though. I really need to get in the habbit of taking more pictures and sharing them...
Anywho, I've done a lot of experimenting with it, because I can't really afford a bottle argon whenever I need to do aluminum, so I've been using 75/25. You can forget about doing anything without pre-heat. It'll just sit there and poop aluminum nuggets all over your casting.... they stick, but it's literally goat droppings piling up on your case. Preheat to about 500*F and then weld and you get great penetration. Pretty sure I had wire feed on 9 or 10 and amperage on C. You really have to keep the wire feed dialed up or it spills through the back of the casting. The outside looks pretty terrible, but once you get INTO the weld, it's plenty good for non-structural work.
When I was playing around with pre-heat, amperage and wire feed - I kept getting really crumbly material. I've played with it enough though that the added aluminum is soft enough to run taps through and cut really nice threads and be plenty soft. If you don't have your settings right it will just crumble if you try and tap it. Graham Motzing said that it's like a hot glue gun and it really is... There is no discretion where you put this stuff. It's all over the place. SHOTGUN WELDING! I really want to get some argon though to see what the welds would look like...
So, the big problem I always have is I have no mill and no lathe. I get around this, but it sucks. I use belt sanders as a milling device :) and they work pretty well. Filing things flat is quite possibly the worst thing you could ever have to to. Files are great for finishing and re-finishing, but forget trying to deck anything with them.... It takes forever and always ends up as a banana surface.
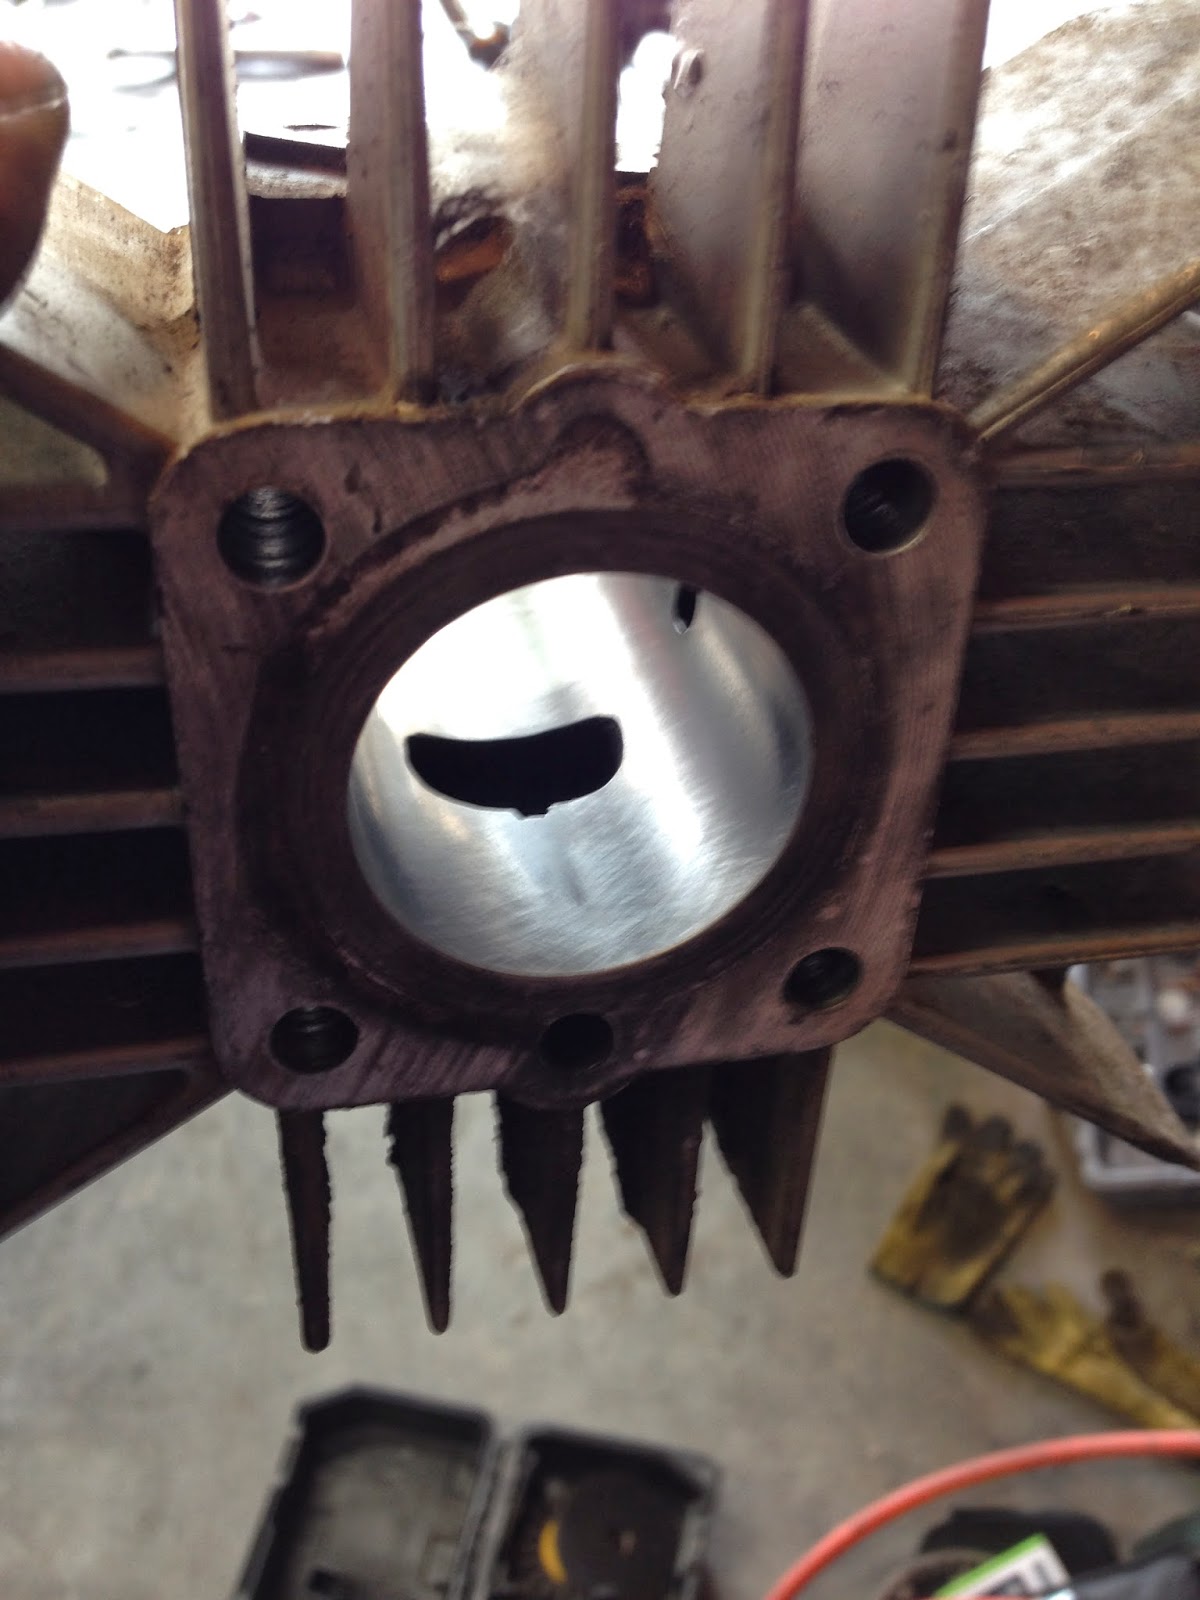
So, there's definitely porosity near the surface of the added material, but inside, it's typically really good (for mopeds). This surface worked just FINE for my purposes. It drilled and tapped well too.
The goood thing is now I have the stock to make SHA intakes as well. I'm sure that'll come in handy. I just free-hand no1curr'd the intake holes, so whatever. It's not like it's going into production. It just has to work. Pretty pleased with how it turned out.
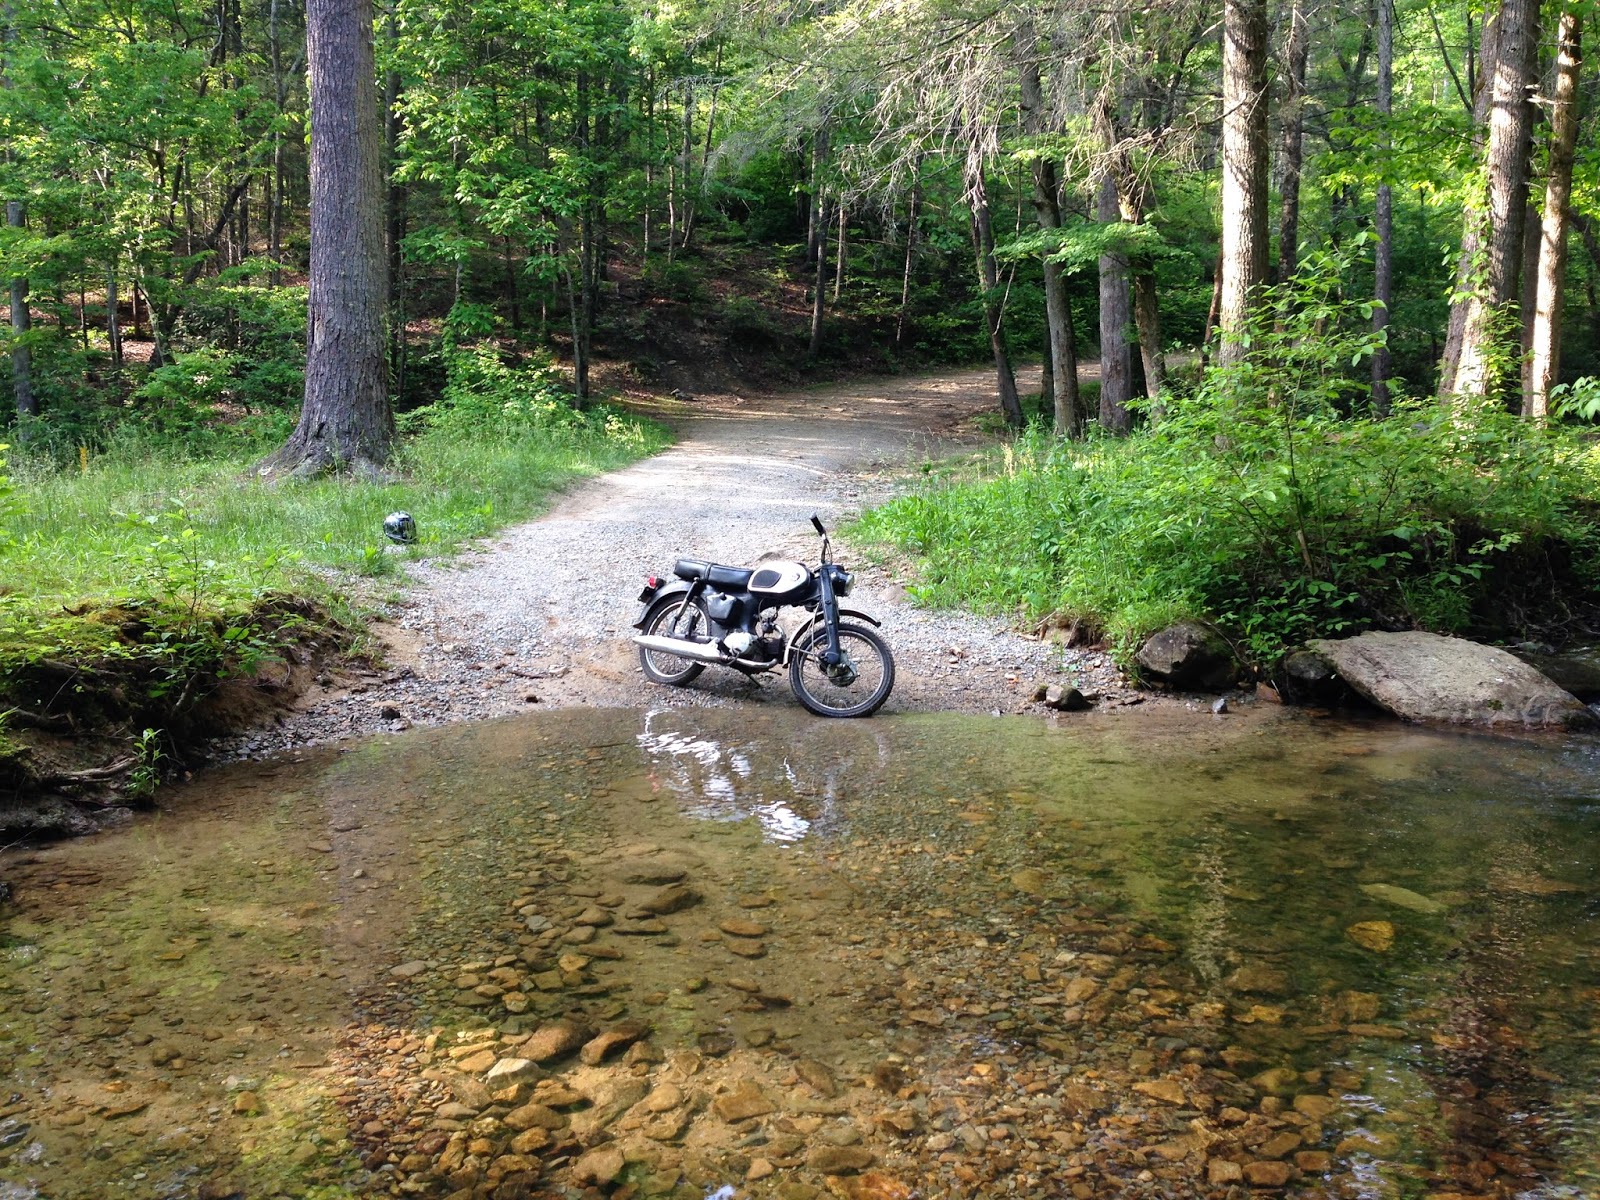
Then, I finally got to ride the Vespa again! I drove back Friday night to meet up with some Cranks and take them out to Tellico for the T.A.T. adventure. Saturday, I went to sleep at 5 and woke up at 8:30 and had beer and charcoal bacon for B-fast. YUM. Drove back to pickup a bike for my friend off CL, but ended up making more sense to rent a trailer, take my friend Alex and his bike with us and get the bike on the way out there - a 1966 Yamaha YA-6.
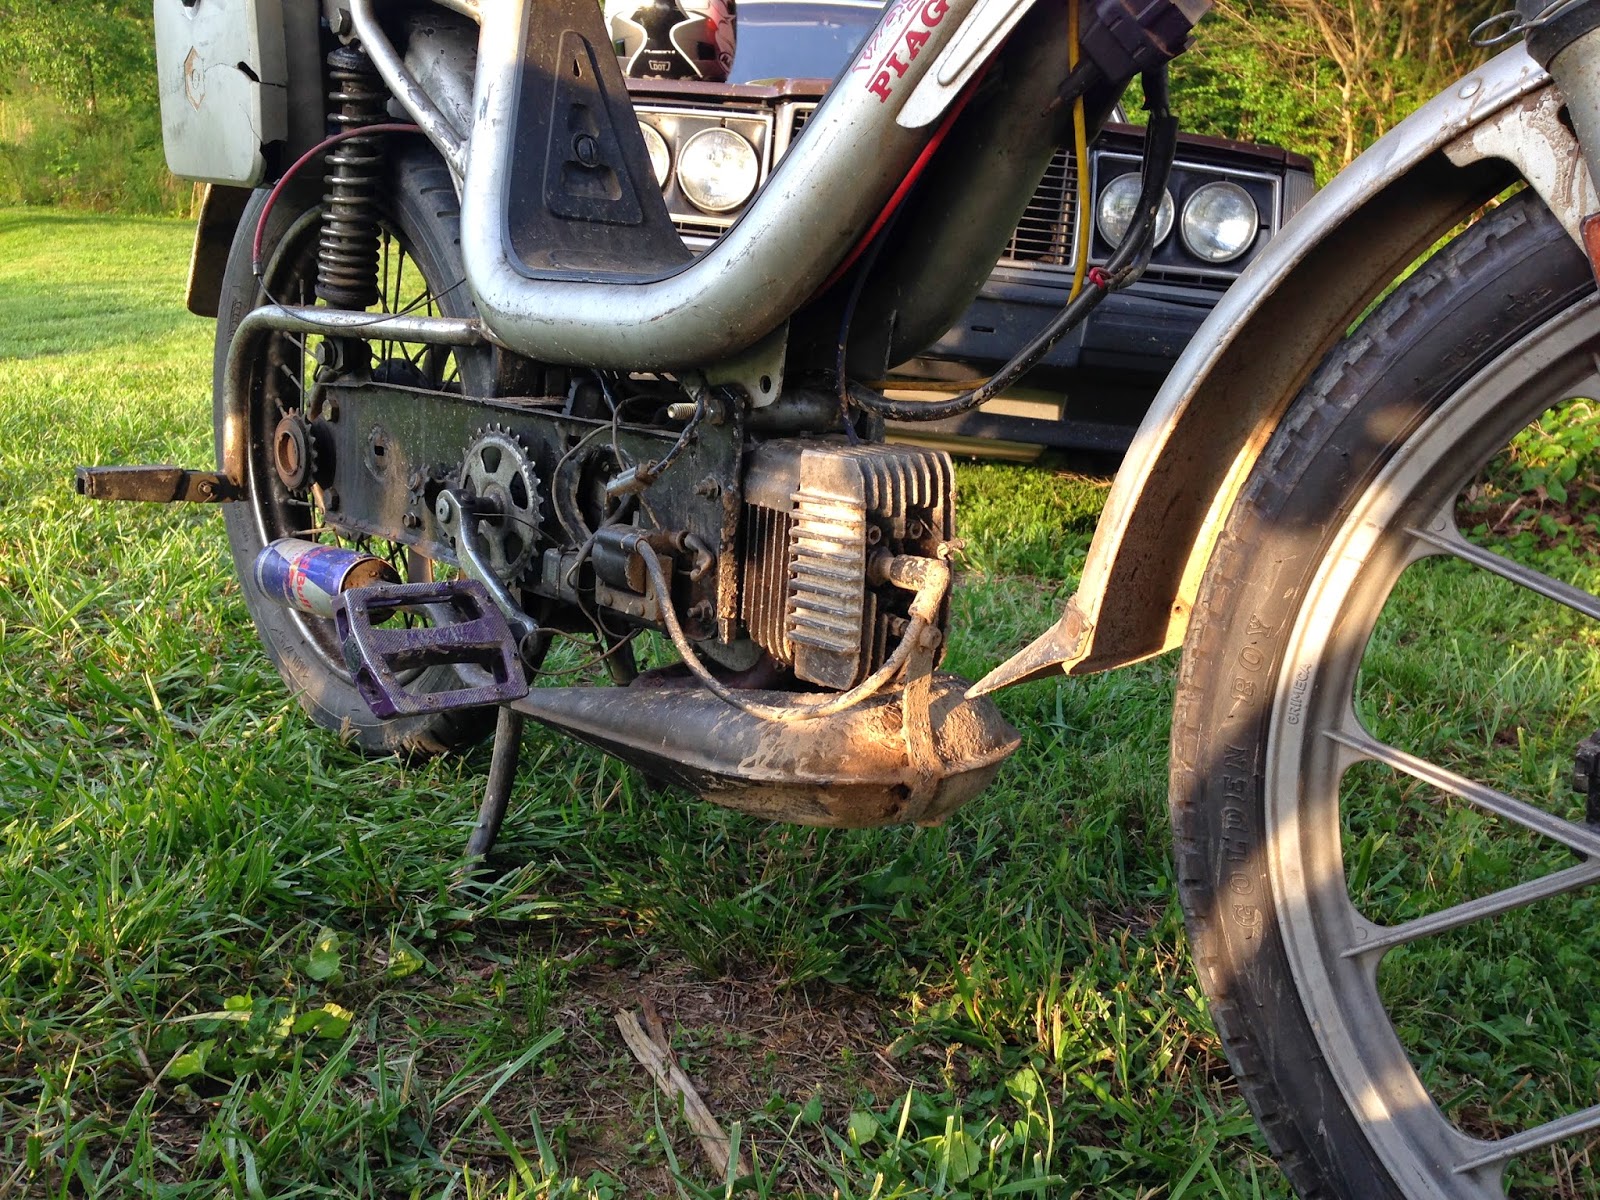
Made it out and the trail was a ton of fun. The water crossings were brutal on electrical and took the belts a minute to dry out after riding through. I also got a huge dent in my pipe from hitting a rock in the trail - you can see it in the last pic.
When we left, one of the guys that runs the camp ground told us he had some old hondas we might want some parts off of. It was an old CT90 and an SL100. Both were over grown with weeds, seized forks, seized wheels, no engines and rusty. We took 2 honda tanks, a kawasaki tank, some beefy shocks, a brake caliper with linkages I need for my derbi and the high pipe from the CT. I was tempted to grab the SL rolling frame, but it needed so much. It's going to be recycled and I hate that, but it's really what needs to happen.
Showing posts with label derbi. Show all posts
Tuesday, May 27, 2014
Monday, April 28, 2014
Vespa Sadness + Derbi Unsaddness + TREATS
So, a great misfortune befell me the other day. I was out trying a new route to the Smokies from Downtown Knoxville and was having a grand ole' time. Although, my speedo cable snapped as soon as I started out and I shoulda taken it as a sign. Rigged up a new mount for my phone on the handle bars and made a nice finished battery tote to charge my phone and all was going ok.
I noticed 20mi in, my cylinder was running a little hot - AGAIN. I had already upjetted by 6 sizes at Inverness because my plug looked a little lean and it ran great. Not a four stroke sound in any range... this had me concerned. I couldn't find an airleak anywhere except a small one at the carb and I attributed this to the crappy SHA shim. I'd been running the pre-Inverness jetting since last fall and all winter. Well, it was running lean again yesterday so I decided to pull over and upjet to be safe and look harder for an airleak when I got home.
Go to slide the carb off a little because the damn 13.13 float bowl won't come off fully seated against the case and THIS happens... UGH. Guess that's where my increasingly lean mixture has been coming from. I feel fortunate I was able to catch it and continue to upjet the thing until it broke and I realized what was going on.
Had to get my girlfriend to come pick me up in Brownie and she got grease on her shorts putting the rack on... bummer :/ Hope that comes out with GoJo.
I have some round stock coming from McMaster and I'm going to try to build up the cases with my spool gun setup, file it flat and make a bolt on intake like on the polini speed cases. I don't really want to just get another case and have this happen again. I thought about taking this bike on pinball and I can't be having the intake break off in the middle of the country.
I decided I wasn't going to let that day be a total loss, so I decided I'd reassemble the Derbi PP engine sitting all over the living room of my apartment. I seized this thing at Inverness because of poor jetting. I put a new exhaust on my 84 Volvo the day before we went to inverness and I ran out of time to jet the Derbi (which is what I intended my girl to ride). Was out riding it Friday night at inverness and I seized it... UGH. No before shots of the cylinder, but check out the piston and the shots of the cylinder AFTER clean up:
My girlfriend's dad says the measure of a good woodworker is not his ability to not make mistakes, but hide, undo, work with and around them WHEN he does. I don't think this applies as directly to mopeds, but I told myself this when I got the cylinder cleaned up haha.
The only residual stuff is some scoring down below the exhaust port, so it should be fine. It's had a hone run over it so it should be smooth. HCl took off the aluminum smeared above and around the ports, then a fresh 38mm dingleberry hone erased all evidence of any damage ever being there around and above the ports. I was very lucky. The dykes ring shattered (which is why the bottom end came apart) and I got away with little damage to the cylinder.
While I had the bottom end apart, I noticed that the bearings were super crunchy, so $30 was allocated to new crank bearings and seals. The transmission bearings were in good shape and hopefully the seals continue to seal once I've got fluid in it after the rebuild. Cross that bridge when I get there I guess.
Impact driver bits make for good final torque bits too. I always tighten everything down to 6ft-lbs and then bump it up to 7.
When I take things apart, I leave the shims and washers on the shafts they go on where they go and use zip ties to hold everything on while it's on the shelf. Somehow, I got the pedal shaft bushing/shim for the left hand crankcase on the output shaft. I realized this when I noticed raw steel threads riding against the aluminum case lol. A quick visit to Biery's blog and an FB message and I was assured I had properly corrected everything. Gear alignment looked good.
I also snagged a new set of 3 sets of 107mm clutch springs from eBay for $8. They're sold on scooter websites for 107mm clutches and the reviews are good for hobbits running the 107mm clutch clutch springs, so I figured I'd give it a go. The stiffest ones are missing and the medium and lower tension ones are what I got. I don't plan on kitting the TT though, so that should do me just fine. Maybe I can trade the ones I don't use for beer to someone with a hobbit. White is medium and black is the lowest tension. They were difficult to get on and the black springs are definitely higher tension than stock. The stock ones barely disengage though so that's not saying much.
I have a NOS piston from Steve Brown to go in the cleaned up cylinder and two more sets of rings! I've wondered if maybe I couldn't clean up the other piston and go crazy cutting the skirt. The bottom ringlands are trashed but the top dykes ringlands are TOTALLY salvageable.... hmmm... it's pretty gnarly though.
Then, today, some TREATS came. 22t sprocket and a new petcock for the ZA70 maxi and a 26t rear tomos sprocket for the derbi. Woot. Can't wait for this week to end. So much wrenching to do next week.
| charge on the fly man |
I noticed 20mi in, my cylinder was running a little hot - AGAIN. I had already upjetted by 6 sizes at Inverness because my plug looked a little lean and it ran great. Not a four stroke sound in any range... this had me concerned. I couldn't find an airleak anywhere except a small one at the carb and I attributed this to the crappy SHA shim. I'd been running the pre-Inverness jetting since last fall and all winter. Well, it was running lean again yesterday so I decided to pull over and upjet to be safe and look harder for an airleak when I got home.
![]() |
| Somehow the vespa did all of Inverness doubled up no problem despite this huge growing airleak. |
Had to get my girlfriend to come pick me up in Brownie and she got grease on her shorts putting the rack on... bummer :/ Hope that comes out with GoJo.
I have some round stock coming from McMaster and I'm going to try to build up the cases with my spool gun setup, file it flat and make a bolt on intake like on the polini speed cases. I don't really want to just get another case and have this happen again. I thought about taking this bike on pinball and I can't be having the intake break off in the middle of the country.
I decided I wasn't going to let that day be a total loss, so I decided I'd reassemble the Derbi PP engine sitting all over the living room of my apartment. I seized this thing at Inverness because of poor jetting. I put a new exhaust on my 84 Volvo the day before we went to inverness and I ran out of time to jet the Derbi (which is what I intended my girl to ride). Was out riding it Friday night at inverness and I seized it... UGH. No before shots of the cylinder, but check out the piston and the shots of the cylinder AFTER clean up:
My girlfriend's dad says the measure of a good woodworker is not his ability to not make mistakes, but hide, undo, work with and around them WHEN he does. I don't think this applies as directly to mopeds, but I told myself this when I got the cylinder cleaned up haha.
The only residual stuff is some scoring down below the exhaust port, so it should be fine. It's had a hone run over it so it should be smooth. HCl took off the aluminum smeared above and around the ports, then a fresh 38mm dingleberry hone erased all evidence of any damage ever being there around and above the ports. I was very lucky. The dykes ring shattered (which is why the bottom end came apart) and I got away with little damage to the cylinder.
While I had the bottom end apart, I noticed that the bearings were super crunchy, so $30 was allocated to new crank bearings and seals. The transmission bearings were in good shape and hopefully the seals continue to seal once I've got fluid in it after the rebuild. Cross that bridge when I get there I guess.
The magic temperature for engine assembly is 300*F. Bake all cases at 300*F for 20 minutes to obtain butter like assembly and dis assembly! I've reused seals I've baked and they're just fine. In an ideal world, you'd replace the seals after you baked them, but I think it's better to risk damaging $30 worth of seals than a rareish crank and transmission.
Everything installed in the left hand crankcase and the right hand one is in the oven! Install crank seals after of course ya dummy.
Impact driver bits make for good final torque bits too. I always tighten everything down to 6ft-lbs and then bump it up to 7.
When I take things apart, I leave the shims and washers on the shafts they go on where they go and use zip ties to hold everything on while it's on the shelf. Somehow, I got the pedal shaft bushing/shim for the left hand crankcase on the output shaft. I realized this when I noticed raw steel threads riding against the aluminum case lol. A quick visit to Biery's blog and an FB message and I was assured I had properly corrected everything. Gear alignment looked good.
I also snagged a new set of 3 sets of 107mm clutch springs from eBay for $8. They're sold on scooter websites for 107mm clutches and the reviews are good for hobbits running the 107mm clutch clutch springs, so I figured I'd give it a go. The stiffest ones are missing and the medium and lower tension ones are what I got. I don't plan on kitting the TT though, so that should do me just fine. Maybe I can trade the ones I don't use for beer to someone with a hobbit. White is medium and black is the lowest tension. They were difficult to get on and the black springs are definitely higher tension than stock. The stock ones barely disengage though so that's not saying much.
I have a NOS piston from Steve Brown to go in the cleaned up cylinder and two more sets of rings! I've wondered if maybe I couldn't clean up the other piston and go crazy cutting the skirt. The bottom ringlands are trashed but the top dykes ringlands are TOTALLY salvageable.... hmmm... it's pretty gnarly though.
Then, today, some TREATS came. 22t sprocket and a new petcock for the ZA70 maxi and a 26t rear tomos sprocket for the derbi. Woot. Can't wait for this week to end. So much wrenching to do next week.
Monday, March 17, 2014
Trinket Arduino Dynamic Timing Video + Spring Break Update
So, first, the video you've all been wanting to seeeeeeee... the DYNAMIC DIGITAL IGNITION video!!! huzzah! Sexy curves in action:
This happened the day before I left for spring break and was glorious. Spring break packin:
I'm working on making this ignition more physically robust and perhaps making a debut of it at Inverness. I still have a little to do moped wise though and a lot to do car wise. Old Yeller has to be gone through entirely for road worthiness as the 2 inch hitch on that car could likely haul both bikes. If it can't, I may be inclined to take brownie since I know his service record better and he has many "new" parts. Brownie needs the new sport exhaust package installed from IPD though, so that has to happen tomorrow if it ever shows up. I'd have to throw a bike on the roof though, and that coupled with is 4 speed transmission = terrible gas mileage.
Spring break wrenching 2014 first up was the maxi. I'll get some new pics of it posted some time before I leave maybe, but I added some chrome trim to the frame and it is CLASSY. Wiring is cleaned up, painted and detailed flywheel and finished up all the little stuff (like shortening the speedo cable). This bike is done for a while till it gets a reed kit. ZA50 geared at 21x37 and has so far been GPS'd at 51mph with all stock parts.
Next up was the derbi. Lots to do to this little guy. I made a puller for the clutch... hardware was $3 total. Had the parts lying around since last time I was home ;) Then I raised the exhaust port a little and resealed the engine (no leaks, knocks on wood). Thought I needed new crank seals but turns out pre-mix was just running down the electrical into the stator (no airfilter) sweet. For some reason, the condenser all the sudden quit working though - like instantly. I was out riding and got a GPS speed of 41 out of it and then it started backfiring. Points arced like a beast, so I did a condenser and all was well. Nothing changed timing wise it just up and quit. Weird/LAME. Can't wait to put digital ignition systems on all my bikes. I also made a CVT cover because the thing throws junk ALL over the frame. GPS speed of 41 was with lots of airleaks, so I'm leaning it out now that it's sealed up.
The weather in Inverness will be glorious. I can't wait. High today was like 40 and last night it was flurrying.
![]() |
| monitoring the switching pin on the microcontroller to make sure it isn't going to be fried. |
![]() |
| board prototype idea |
This happened the day before I left for spring break and was glorious. Spring break packin:
I'm working on making this ignition more physically robust and perhaps making a debut of it at Inverness. I still have a little to do moped wise though and a lot to do car wise. Old Yeller has to be gone through entirely for road worthiness as the 2 inch hitch on that car could likely haul both bikes. If it can't, I may be inclined to take brownie since I know his service record better and he has many "new" parts. Brownie needs the new sport exhaust package installed from IPD though, so that has to happen tomorrow if it ever shows up. I'd have to throw a bike on the roof though, and that coupled with is 4 speed transmission = terrible gas mileage.
Spring break wrenching 2014 first up was the maxi. I'll get some new pics of it posted some time before I leave maybe, but I added some chrome trim to the frame and it is CLASSY. Wiring is cleaned up, painted and detailed flywheel and finished up all the little stuff (like shortening the speedo cable). This bike is done for a while till it gets a reed kit. ZA50 geared at 21x37 and has so far been GPS'd at 51mph with all stock parts.
Next up was the derbi. Lots to do to this little guy. I made a puller for the clutch... hardware was $3 total. Had the parts lying around since last time I was home ;) Then I raised the exhaust port a little and resealed the engine (no leaks, knocks on wood). Thought I needed new crank seals but turns out pre-mix was just running down the electrical into the stator (no airfilter) sweet. For some reason, the condenser all the sudden quit working though - like instantly. I was out riding and got a GPS speed of 41 out of it and then it started backfiring. Points arced like a beast, so I did a condenser and all was well. Nothing changed timing wise it just up and quit. Weird/LAME. Can't wait to put digital ignition systems on all my bikes. I also made a CVT cover because the thing throws junk ALL over the frame. GPS speed of 41 was with lots of airleaks, so I'm leaning it out now that it's sealed up.
The weather in Inverness will be glorious. I can't wait. High today was like 40 and last night it was flurrying.
Subscribe to:
Posts (Atom)