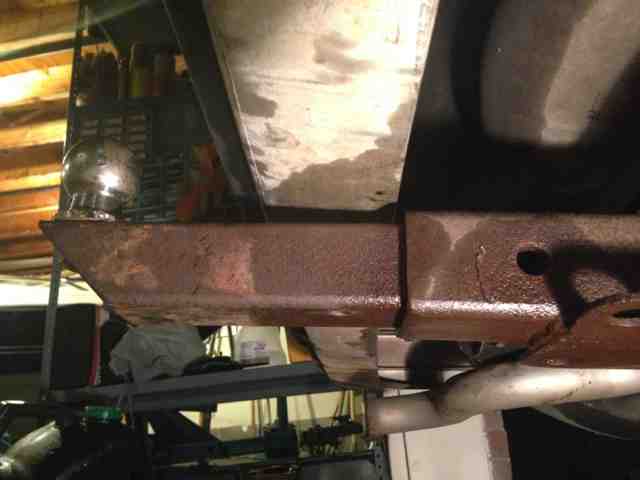
Alrighty... update. I maxxed out my motor adjustment two weeks ago for max top speed since I was going on a long distance highway ride.
100mi into the ride and we stop for gas... belt starts slipping pretty good and won't start without the decomp pulled. Ride it another 60mi and the header breaks on my piece mealed together circuit pipe. Limp it back home 40mi.
In all fairness though, I have put a ton of miles on this belt - many of them doubles miles. I can't really complain about this belt. I need to try a malossi (because I hear they're the best!) but I've got a warranty replacement on the gates, so I'll at least be trying another one of those...
It's been real with the stock transmission parts, but I think I'm going to be considering getting rid of my stock vario if I can't get the cheeks I got to not bind and balance - def picking up a euro rear.
My current cheeks ride great for about 20-30 mins, after that ONE weight starts sticking after WOT runs. Variates great until then, but gets stuck. Never had this problem in city riding. I'm really anxious to try the polini anyway and see how much of an improvement it is.
The new cheeks I have are the high travel stock cheeks referenced in one of the other vespa threads on mopedarmy - these are cheeks with the 17xxxx p/n on the cheeks. They have roughly 3mm extra travel (I concurred with Allen Halk's measurements). Stock this variator doesn't variate as far as my notched lower travel variator, but the weights are indeed hitting the wall, and the ramps more aggressive, so I'll have increased travel and accel with the new notched vario. Hopefully, doing some things differently to this one yields a variator that doesn't stick.
One thing that is tempting me away from doing another stock notched vario, is that with a stock un-notched bottom ramp, the bike vibrates a WHOLE lot less. I'm thinking this is the vibration that broke my subframe in south carolina and my header two weekends ago. When I put the notched vario in from Allen - it was night and day smoothness difference. If I can do some ghetto cheap dynamic balancing on the notched vario this winter, I may go ahead and run it. Something tells me this is far harder than I think it is though...
Joe is looking to hook me up with some euro parts this winter, so let's hope that pans out ;)
Really looking forward to disk brakes, new notched vario and some smokies trips in the spring.... Can't wait!
Also, brownie turns 30 soon! Gonna have to do a history on him during winter break to let people know how special he is... My mom just found a bunch of paper work pertaining to him, so it should be an interesting write up looking at documentation I've never seen before :)
Friday, November 22, 2013
Tuesday, October 22, 2013
Vespa Subframe Reinforcement
So this past weekend, I decided I'd reinforce my Vespa subframe on my grande... Earlier this year at THHHEEEEE BUZZARDS rally (which was epic, even in the back of the break down vehicle) I was 25mi into the 100mi ride on Saturday when my right tab broke off my subframe at about 45-47mph. Needless to say this was a harrowing experience and my moped riding for the weekend was over.
The Vespa stayed parked for a while, because I couldn't decide whether to replace or rebuild the subframe. I didn't have a welder, so rebuilding wasn't an option at the time. I had gone ahead and made templates for plates and began to cut them out with my angle and die grinder (very time consuming). I built up an OA rig and was contemplating doing the project with O/A - I'm so glad I didn't do this because the welding would've taken forever. Unfortunately, my cutting torch parts still didn't get here in time so I had to mechanically remove material any way. This past weekend I picked up a miller promig 135 with gas shielding (and a bunch of HID stuff ;) and I decided to go for it since it was my fall break.
I did some work on Thursday when I got home, but it was mostly getting all the kinks out, setting up the welder and riding with nashville's vintage motorcycle group Pseudomoto. The CB100 rode great and got me in shape to work on the Vespa.
My plan consisted of using cold roll steel to inlay the cutout of the subframe. I used 1/8" for the major inlays. It's been over a year since I'd had any time on a welder, so my welds weren't pretty but they should hold just fine... I didn't lay anything that was so bad I had to cut it out, but it definitely could have been better. I made sure to put a bevel on the pieces that would be adjoining to thinner material - this along with torch angle is important to get a consistent heat and penetration when welding together materials of different thicknesses.
In my infinite wisdom, I did not do a fit check with the transmission components installed with everything tacked toegether, and I ended up having to remove metal from my main reinforcing plates after welding them in completely. This made it way uglier and take way longer... IF YOU REINFORCE A SUBFRAME THIS WAY, DON'T FORGET THE TRANS CUT OUTS!!!!! This was a HUGE disaster and I would've finished the bike Saturday instead of Sunday (because the paint took a whole day to dry) as I didn't have it in me to finish fabrication Saturday night after this mistake.
From there I did some cosmetic welding and sanded everything down and started prepping for paint (and of course did another fit check before paint lol). I decided to go with two coats of automotive primer and two coats of Rustoleum gloss enamel.
Re-assembly went fairly smooth except for the 4 bolts that go into the rear transmission housing were too short with the lock washers (I need to get new ones that are long enough for lock washers) and the main bolt up front that the subframe hinges on was too short. Everything else went smoothly and the bike was back together and running.
Another thing I would suggest to those who would want to do this in the future is to consider using round stock instead of plate. The plate was incredibly thin in some spots and certainly could have been thicker. Round stock would allow you more flexibility and be way easier to manipulate.
Lastly, I suggest you just make another subframe entirely. After having done a reinforced subframe, I think that if I'd had an oxy-acetylene torch setup functioning or a plasma cutter, I wouldn've just gone this route. It would've been more effective and easier. I'm not sure I'd recommend doing it out of plate either - I really think that maybe next year I'll build a tube sub-frame. I'm not incredibly satisfied with the reinforced stock subframe.
The Vespa stayed parked for a while, because I couldn't decide whether to replace or rebuild the subframe. I didn't have a welder, so rebuilding wasn't an option at the time. I had gone ahead and made templates for plates and began to cut them out with my angle and die grinder (very time consuming). I built up an OA rig and was contemplating doing the project with O/A - I'm so glad I didn't do this because the welding would've taken forever. Unfortunately, my cutting torch parts still didn't get here in time so I had to mechanically remove material any way. This past weekend I picked up a miller promig 135 with gas shielding (and a bunch of HID stuff ;) and I decided to go for it since it was my fall break.
I did some work on Thursday when I got home, but it was mostly getting all the kinks out, setting up the welder and riding with nashville's vintage motorcycle group Pseudomoto. The CB100 rode great and got me in shape to work on the Vespa.
My plan consisted of using cold roll steel to inlay the cutout of the subframe. I used 1/8" for the major inlays. It's been over a year since I'd had any time on a welder, so my welds weren't pretty but they should hold just fine... I didn't lay anything that was so bad I had to cut it out, but it definitely could have been better. I made sure to put a bevel on the pieces that would be adjoining to thinner material - this along with torch angle is important to get a consistent heat and penetration when welding together materials of different thicknesses.
Here's some footage from me working... not as epic as I wanted it to be... cam kept dying :/
In my infinite wisdom, I did not do a fit check with the transmission components installed with everything tacked toegether, and I ended up having to remove metal from my main reinforcing plates after welding them in completely. This made it way uglier and take way longer... IF YOU REINFORCE A SUBFRAME THIS WAY, DON'T FORGET THE TRANS CUT OUTS!!!!! This was a HUGE disaster and I would've finished the bike Saturday instead of Sunday (because the paint took a whole day to dry) as I didn't have it in me to finish fabrication Saturday night after this mistake.
From there I did some cosmetic welding and sanded everything down and started prepping for paint (and of course did another fit check before paint lol). I decided to go with two coats of automotive primer and two coats of Rustoleum gloss enamel.
Re-assembly went fairly smooth except for the 4 bolts that go into the rear transmission housing were too short with the lock washers (I need to get new ones that are long enough for lock washers) and the main bolt up front that the subframe hinges on was too short. Everything else went smoothly and the bike was back together and running.
For Those Thinking About Doing This:
I would suggest including the trans cutouts in your design if you decide to go the plate overlay method.
Another thing I would suggest to those who would want to do this in the future is to consider using round stock instead of plate. The plate was incredibly thin in some spots and certainly could have been thicker. Round stock would allow you more flexibility and be way easier to manipulate.
Lastly, I suggest you just make another subframe entirely. After having done a reinforced subframe, I think that if I'd had an oxy-acetylene torch setup functioning or a plasma cutter, I wouldn've just gone this route. It would've been more effective and easier. I'm not sure I'd recommend doing it out of plate either - I really think that maybe next year I'll build a tube sub-frame. I'm not incredibly satisfied with the reinforced stock subframe.
Some how I picked up 5mph during the rebuild...
I took her for some speed runs and I guess she's loving the cold weather and not having a huge gaping crack in the exhaust :) I hit 52mph with stock vario notched with my aluminum weights, gates AX39 tri-power belt and a polini blue contra in the back with a 13mm carb and a DR65. The amount of vibration is still a bit disconcerting, so a mazi crank this winter (thanks for the suggestion Joe) and a homeade dynamic balancer for my stock vario (that'd be fun right??) or a polini vario are in order. I can probably build a ghetto balancing setup cheaper than I can buy a polini vario and weights, so I'm probably going to go that route... would be awesome to offer that as a service to all the stock class racers...
The subframe is fixed, but before next rally season ...
I set some parts on the bike to see how possible throwing a disk brake on the front would be and I think I'm going to go for it this winter since the forks are substantial enough, hyrdaulic and the fork lowers are steel. The setup would be a Z mag with china disk fitted and a honda caliper and master cylinder with a custom stainless line from the local hose manufacturer. With a disk brake, this would be the ultimate doubles bike for knoxville campus or rally bike period. I'm super stoked to bring this bike back up here next semester and rally on it next summer if/when I get out of school :P
Labels:
deadpeds,
frame,
grande,
moped,
pseudomoto,
reinforcement,
sub,
subframe,
vespa,
winning
Friday, July 26, 2013
Meet "Blue Boy" and the 125
Friday, July 5, 2013
July 4th
So it's been a while since I've posted... I got a new co-pilot on Wednesday,
Did an oil change on the motorcycle (eeewwww magnetic drain plug)

Then I tapped the drain bolt up to the next size because somehow I stripped it out???? (still trying to figure out how that happened)

Then I removed the old ball hitch insert from the 78 hitch I installed on Old Yeller that was rusted in place.... An oscillating tile cutter, a tow chain, pb blaster and a sledge hammer were involved...

I also helped Sam finish a resurrection maxi that we kitted... fun bike. The 70cc TCCD, circuit, phbg combo really worked well (except for the air filter haha). The weekend isn't out yet... we'll see what else I do ;)
UPDATE: So today is the 6th and I hooked my phone into my bike... So pumped to have non-dead phone at a rally finally. No
battery on the bike either - 100% regulated smoothed power straight
from the stator. Maxes out at 12.5VDC right above idle and stays there
till redline.Tuesday, April 23, 2013
THE STABLE
![]() |
| Brownie - the 1984 244 355k mi |
![]() |
| 1985 General 5 Star - 505/3BX |
![]() |
| The Puchonda |
| Swinger 1 |
| 1978 Vespa Grande |
| Honda S90 |
![]() |
| 1978 Maxi Sport MKii (the one that started it all) |
![]() |
| 1978 Puch Mocha Magnum - in progress |
![]() |
| "Blue Boy" 1972 CB100 (left) and 1974 CB125 (right) |
Monday, April 22, 2013
10 Minute Sealed Beam Conversion
Cut out the old, bash the bulb, knock out the bits.
Now, grab a turn signal base from one of these:
And attach with tie wire and a spring.
Now, grab a turn signal base from one of these:
And attach with tie wire and a spring.
DONE.
Saturday, April 20, 2013
Tri-Power Gates AX39 Belt for Vespa!
Hey guys,
So I found this awesome belt the other day while I was at Oreilly's. It's a tri-power series belt.
It says it's oil resistant and rated for temperatures over 100*F higher than what the standard belts are and is oil resistant.
It says it's also static conductive, so I feel like that means it's got a metallic element. Anywho, I'll be testing this out on my Vespa grande and I'll be sure to report back.
The standard gates AX39 that I had on there only lasted about 5 months of sparse riding.
Also, if you buy from oreilly's, they guarantee it for three years no questions asked! I told the guy I'd probably shred it on my vespa this summer and he said it didn't matter! Just bring it in and I'll get a new one! Gotta keep your receipt though.
Here's a link to a specs sheet on all the belt series offered by gates:
http://www.gates.com/ptpartners/file_display_common.cfm?thispath=Gates%2Fdocuments_module&file=Vol_57_No_6_High_Temperature_and_V-belts.pdf
So I found this awesome belt the other day while I was at Oreilly's. It's a tri-power series belt.
It says it's oil resistant and rated for temperatures over 100*F higher than what the standard belts are and is oil resistant.
It says it's also static conductive, so I feel like that means it's got a metallic element. Anywho, I'll be testing this out on my Vespa grande and I'll be sure to report back.
The standard gates AX39 that I had on there only lasted about 5 months of sparse riding.
Also, if you buy from oreilly's, they guarantee it for three years no questions asked! I told the guy I'd probably shred it on my vespa this summer and he said it didn't matter! Just bring it in and I'll get a new one! Gotta keep your receipt though.
Here's a link to a specs sheet on all the belt series offered by gates:
http://www.gates.com/ptpartners/file_display_common.cfm?thispath=Gates%2Fdocuments_module&file=Vol_57_No_6_High_Temperature_and_V-belts.pdf
Labels:
belt,
boxer,
bravo,
ciao,
gates,
grande,
high temperature,
moped,
oil resistant,
performance,
si,
tri-power,
variator,
vespa
Subscribe to:
Posts (Atom)